Tips on Finish Painting
Painting and finishing a sign, especially using SIGN·FOAM , generates keen interest. This is partly because there are so many viable options available to the sign maker with these materials.
Let's review sign priming and painting to lay a good foundation for specific applications. Priming is done before any stencils or paint is applied.
SIGN·FOAM is not an organic material. Nothing can soak through the surface to the interior of the material. It is 100% waterproof before you put a drop of paint on the surface. SIGN·FOAM will not rot, decay or decompose. Unaffected by temperature, humidity or barometric pressure, SIGN·FOAM is highly chemically resistant. Nothing in your shop or its finished environment will attack it chemically. Therefore the finishing process has little bearing on the durability of the base material and you no longer have to think about primer and paint as protective measures. Where SIGN·FOAM is concerned, priming and painting are simply a matter of aesthetics.
Working without Primer will to Speed-up Production Time: No primer is needed to protect SIGN·FOAM from the shop environment, applying paint directly speeds production time dramatically. You may use any type of paint directly;water based, oil based, and even lacquer-based paints all adhere well. Painting non-primed SIGN·FOAM leaves a slightly textured finish resembling painted sandpaper. For projects where the surface texture will not be visually scrutinized, this is a cost and time effective method. However, it may not be the right process for the majority of your sign projects. We suggest you test paint some unprimed SIGN·FOAM to determine when it is an acceptable finish for you.
When to use Primer: It is likely the majority of your sign projects will require a semi-smooth or smooth surface for aesthetic reasons. This is accomplished by using primer and sanding after the primer is dry.
Tips for Achieving a Smooth Surface
Achieving a smooth surface with SIGN·FOAM is a simple process that once learned, is predictable and repeatable. First, fill in the top surface of SIGN·FOAM with primer. To begin, you will want to sand the entire sheet. Because the sheets are cut to thickness as ordered, this process can leave machining marks across the surface of the sheet. These, along with any other machining marks left behind during the construction stage, should be removed.
Sand off the logo located on the Bottom Corner of the Sheet: The ink from this stamp will occasionally react with certain primers, causing the graphic to bleed through the primed surface. Sanding can be done with an electric or pneumatic palm sander and 220 grit wet & dry sandpaper.
Alternating Wet and Dry Sandpapers to Finish: You may have noticed that the use of alternating "wet & dry" sandpaper is recommended. Doing this minimizes debris on the surface of SIGN·FOAM . This does not mean to only wet sand.
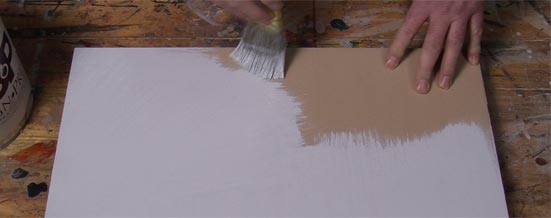
After the surface is sanded, use a shop brush or compressed air to clean off the surface. At this point, you apply the first coat of primer. Your first coat of primer should do the majority of work. You can use a brush, roller or spray to apply primer but take care not to apply to much primer on the first coat; this can lead to drying problems.

If you feel a smoother surface it is necessary, a second coat of primer should be applied. SIGN·FOAM can be finished as smooth as glass by repeating these simple steps until you are satisfied with the result. When you have primed the surface to your satisfaction and the primer is dry, you may apply the paint topcoat according to the manufacturer's recommendations.
Tips to Create a "High Gloss Mirror Finish": Proper viscosity of primer is crucial to a successful paint job. Too thin a primer and you do not have enough solid material to fill in the texture. Too thick a primer, you will be waiting an unreasonable amount of time in between coats and not dry in a very timely manner.
To achieve this look, start with a high build polyester spray primer; this is an auto-body two part primer. Sand with 600 grit wet and dry sandpaper, and then apply a top coat of polyurethane paint, polyester enamel or auto epoxy.
Tips to Remember: Paint has less the one tenth of the solid material that primer has, so it will only add color. The surface's smoothness must be satisfactory before paint is applied. Make sure to check local ordinances for spray booths and exhaust systems and consider using an auto body shop if you do not expect to do much of this type of work.
